Now a days most of the mobile applications that use biometric authentication to secure data access. This allows users to authenticate via the fingerprint sensor and the face ID on those devices that have these capabilities. In this article, I’m going to show you how to add Biometric Authentication in Xamarin Forms application.
Let’s Start
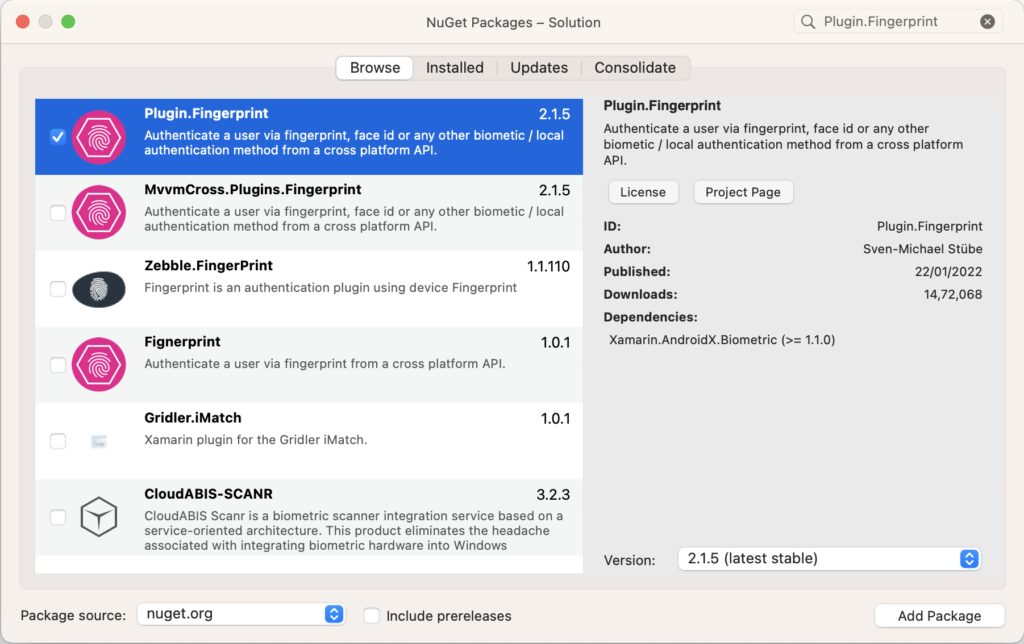
In this sample demo we will use Plugin.Fingerprint nuget package.
Plugin.Fingerprint
Plugin.Fingerprint enables us to authenticate the user via fingerprint or face id or any other biometric.
1 – Install Plugin.Fingerprint nuget

2 – iOS Setup
2.1 – Add “NSFaceIDUsageDescription” to your Info.plist to describe the reason your app uses Face ID
<key>NSFaceIDUsageDescription</key>
<string>Need your face to unlock secrets!</string>
thats it for iOS Let’s move to android setup.
3 – Android Setup
3.1 – Add “USE_FINGERPRINT” permission in manifest file
<uses-permission android:name="android.permission.USE_FINGERPRINT" />
Set “Resolver” in “OnCreate()” method of MainActivity.cs
CrossFingerprint.SetCurrentActivityResolver(() => Xamarin.Essentials.Platform.CurrentActivity);
Now, Setup is completed for android as well.
4 – Setting up the UI
4.1 – Creating a MainPage.xaml
<?xml version="1.0" encoding="utf-8" ?>
<ContentPage
    x:Class="XFBiometric.MainPage"
    xmlns="http://xamarin.com/schemas/2014/forms"
    xmlns:x="http://schemas.microsoft.com/winfx/2009/xaml">

    <StackLayout>
        <Frame
            Padding="24"
            BackgroundColor="#2196F3"
            CornerRadius="0">
            <Label
                Margin="0,20,0,0"
                FontSize="36"
                HorizontalTextAlignment="Center"
                Text="Biometric Sample"
                TextColor="White" />
        </Frame>


        <StackLayout
            x:Name="StackContainer"
            Margin="0,150,0,0"
            IsVisible="False"
            VerticalOptions="CenterAndExpand">

            <Image
                x:Name="ImgSuccess"
                HeightRequest="200"
                WidthRequest="200" />

            <Label
                x:Name="LblMsg"
                FontAttributes="Bold"
                FontSize="25"
                HorizontalTextAlignment="Center"
                TextColor="Gray" />

        </StackLayout>

        <Button
            x:Name="BtnAuthenticate"
            Margin="0,0,0,50"
            Padding="20,15"
            BackgroundColor="#2196F3"
            Clicked="OnAuthenticateClicked"
            CornerRadius="30"
            FontAttributes="Bold"
            FontSize="20"
            HorizontalOptions="Center"
            Text="Authenticate"
            TextColor="White"
            VerticalOptions="EndAndExpand" />

    </StackLayout>
</ContentPage>
4.2 – MainPage.xaml.cs
using System;
using System.Collections.Generic;
using System.ComponentModel;
using System.Linq;
using System.Text;
using System.Threading.Tasks;
using Plugin.Fingerprint;
using Plugin.Fingerprint.Abstractions;
using Xamarin.Forms;

namespace XFBiometric
{
    public partial class MainPage : ContentPage
    {
        public MainPage()
        {
            InitializeComponent();
        }

        async void OnAuthenticateClicked(System.Object sender, System.EventArgs e)
        {
            var availability = await CrossFingerprint.Current.IsAvailableAsync();

            if (!availability)
            {
                StackContainer.IsVisible = false;
                await DisplayAlert("Warning!", "No biometrics available", "OK");

                return;
            }

            var authResult = await CrossFingerprint.Current.AuthenticateAsync(new AuthenticationRequestConfiguration("Heads up!", "Please validate biometric !!"));

            if (authResult.Authenticated)
            {
                Device.BeginInvokeOnMainThread(() =>
                {
                    StackContainer.IsVisible = true;
                    ImgSuccess.Source = ImageSource.FromFile("success.png");
                    LblMsg.Text = "Authentication Successfully !!";
                });
            }
            else
            {
                Device.BeginInvokeOnMainThread(() =>
                {
                    StackContainer.IsVisible = true;
                    ImgSuccess.Source = ImageSource.FromFile("cross.jpg");
                    LblMsg.Text = "Authentication Failed !!";
                });
            }
        }
    }
}
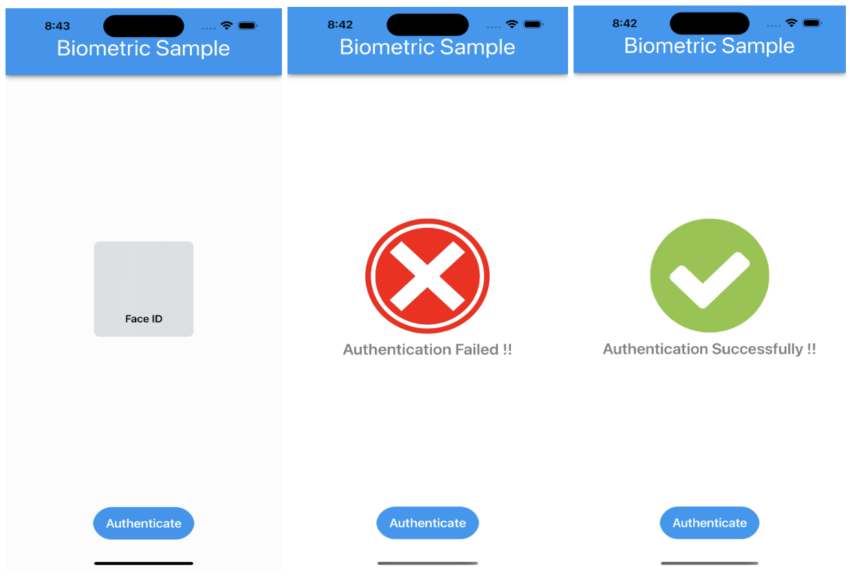
5 – Result
That’s all for now!
You can check the full source code here.
Happy Coding! 😀
You may also like


